
That empty attic above your head could be the extra bedroom, home office, or family retreat your house desperately needs, without the cost or hassle of a ground-up addition. Converting unused attic space into livable square footage is one of the smartest ways to add value and function to your home. But before you start picturing the finished room, it helps to understand what the project actually involves, from structural checks to permits to finishing touches. This guide walks through the key considerations so you can plan a conversion that is safe, comfortable, and built to last.
Assessing Structural Readiness for Conversion
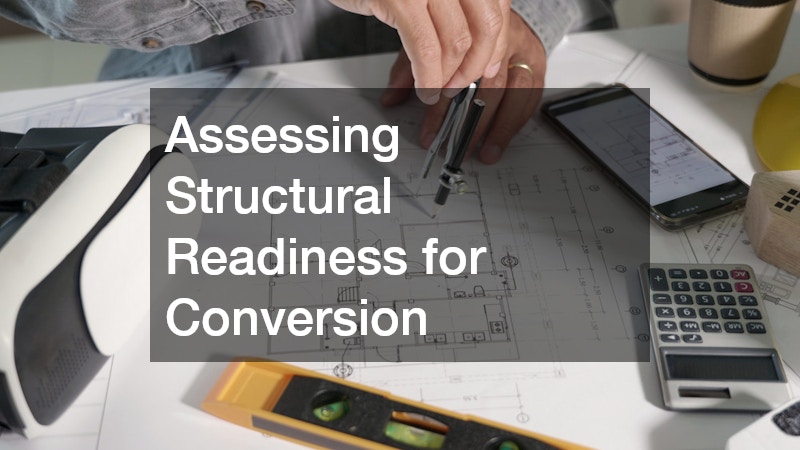
Not every attic is a good candidate for conversion, and the first step is figuring out whether your roof framing and floor joists can support the added weight and activity of a living space. Attics framed with traditional rafters and collar ties tend to offer more open space to work with than those built with engineered trusses, which are harder to modify. A structural engineer or experienced contractor can tell you quickly whether reinforcement is needed before you invest in design plans.
This is also the point where many homeowners bring in a home renovation contractor to evaluate the space firsthand and outline what modifications are realistic within your budget. They can flag issues like insufficient ceiling height, undersized joists, or roof lines that limit usable floor area. Getting this assessment early prevents costly surprises once construction is underway.
Checking Ceiling Height and Local Code Requirements
Most building codes, based on the International Residential Code, require a minimum ceiling height of seven feet across at least 50% of the room’s floor area for it to legally qualify as habitable space. Areas where the ceiling drops below five feet typically can’t be counted toward that square footage at all, though local jurisdictions may adjust these numbers slightly, so it’s worth confirming the exact requirement with your building department before making assumptions. If your roofline is steep, you may already have enough clearance in the center of the attic, but low areas near the eaves might only work for storage, built-in seating, or bookshelves tucked into the knee walls. A gable or gambrel roof generally offers more usable headroom than a simple gable with a shallow pitch, and roofs with a slope of 8:12 or steeper tend to be the best candidates for conversion without major structural changes. Measuring your existing peak height before hiring anyone gives you a realistic sense of what kind of room is achievable. Use a tape measure or laser level from the finished floor to the underside of the ridge beam, and take several measurements across the width of the space since older homes often have slight variations. If you’re falling short by only a few inches, options like raising the roof, adding a shed or gambrel dormer, or lowering the attic floor by adjusting joists can sometimes bridge the gap, though each comes with its own cost and structural implications worth discussing with a contractor.
Before you get attached to a floor plan, check your ceiling height against the International Residential Code (IRC), which most municipalities use as a baseline. The typical standard requires at least 7 feet of clearance over 50% of the finished floor area, with a minimum height of 5 feet at the knee walls where the roofline slopes down. If your attic’s ridge height falls short, you may need to explore options like raising the roof or installing a shed dormer to gain usable space. Local codes also dictate window size, egress requirements, and stair specifications, so it’s worth checking with your municipality’s building department early in the planning process. Egress windows for bedrooms typically need a minimum opening of 5.7 square feet, with specific minimums for height and width, and the sill can’t sit more than 44 inches above the floor. Stair specifications matter too — expect requirements around minimum tread depth, riser height, and headroom clearance above the stairs, often at least 6 feet 8 inches. Some jurisdictions require a permanent staircase rather than a pull-down ladder for any space classified as a bedroom or living area. Others may also require smoke detectors, a second means of egress, or specific insulation values (R-values) for the roof assembly. Knowing these rules upfront helps you avoid redesigning the layout halfway through the project, and can save you from costly rework after framing or drywall is already in place.
Planning Insulation and Ventilation for Comfort
An attic that’s too hot in summer and too cold in winter isn’t livable no matter how nicely it’s finished, which is why insulation and airflow planning matter as much as the framing. Because attics sit directly under the roof, they’re exposed to more extreme temperature swings than any other room in the house, so getting this step right determines whether your new space actually gets used. Spray foam, batt, and rigid foam insulation each have different performance levels and price points, and your choice should account for your climate and roof design. Closed-cell spray foam offers the highest R-value per inch (around R-6) and doubles as an air barrier, making it a popular choice for tight rooflines with limited depth, though it’s the most expensive option. Fiberglass batts are budget-friendly and easy to install between rafters, but they’re less effective at sealing gaps and can lose performance if compressed or improperly fitted. Rigid foam boards fall in between, offering solid insulation value and moisture resistance, though they require careful sealing at the seams to avoid thermal bridging. Building codes typically call for higher R-values in attic spaces than in walls—often R-38 to R-60 depending on your region—so check local requirements before finalizing your material choice. It’s also worth consulting a contractor about whether you’re insulating the roofline (for a conditioned attic) or the attic floor (for an unconditioned space), since this decision affects both material needs and ventilation strategy. Proper ventilation also prevents moisture buildup that can lead to mold or wood rot over time. A balanced system of soffit vents, ridge vents, or gable vents keeps air moving so condensation doesn’t collect on the underside of the roof deck, especially in cold climates where warm indoor air meets cold roof surfaces. Skipping this step is one of the most common—and costly—mistakes homeowners make when converting an attic, since moisture damage often goes unnoticed until it’s already compromised the structure.
Before tackling equipment, insulation deserves attention because it determines how hard any HVAC system has to work. Most codes call for a minimum of R-38 to R-60 in attic ceilings, depending on climate zone, and spray foam or rigid foam board along the roofline is common in finished attics since it creates a conditioned space rather than a vented one. Skipping this step often leads to rooms that are freezing in winter and stifling in summer, no matter how powerful the equipment is. Ventilation still matters even in a conditioned attic, since trapped moisture can cause mold and rot behind new walls. Baffles that maintain airflow from soffit vents to the ridge, combined with a vapor barrier, help control humidity without undermining the insulation’s performance. Because attics interact directly with the rest of your home’s climate control system, many homeowners find it necessary to extend ductwork or add a dedicated unit during HVAC installation for the new space. A mini-split system is often a practical option since it avoids the need to route large ducts through tight rafter bays, and a single-zone unit rated around 9,000 to 12,000 BTUs can typically handle a 300 to 500 square foot attic room. The electrical work for these units should be handled by licensed electricians to ensure the wiring, breaker capacity, and disconnect placement meet code requirements. Whatever system you choose, sizing it correctly for the room’s square footage, ceiling height, and insulation quality keeps energy bills manageable. An HVAC contractor can run a load calculation, often called a Manual J, to confirm the unit isn’t oversized or undersized before installation begins.
Evaluating Roof Condition Before You Build
Since your attic conversion depends entirely on the integrity of the roof above it, it makes sense to have that roof inspected before any interior work begins. A roof nearing the end of its lifespan, or one with existing leaks, should be addressed first so you’re not finishing drywall only to deal with water damage a year later. This is also a good time to check flashing, soffits, and attic vents for wear.
Bringing in roofing and gutter contractors for a full inspection ensures that water is being properly diverted away from the areas you’re about to finish inside. They can also identify whether your gutters are adequately sized to handle runoff from a roof that may now include new dormers or skylights added during the conversion. Addressing these details early protects your investment in the finished attic space.
Clearing the Property Before Construction Begins

Attic conversions sometimes require exterior work, such as adding dormers, skylights, or additional roof vents, which means contractors need clear access to your roofline. Overhanging branches or trees positioned too close to the house can interfere with scaffolding, material delivery, and safe working conditions. Addressing landscaping obstacles before the crew arrives keeps the project on schedule.
If large branches or entire trees are blocking access or posing a risk to the roof, arranging tree removal ahead of time is a practical step many homeowners overlook. This is especially important if your plans include large skylights or a roof dormer, since equipment will need room to maneuver safely. A quick walk around your property with your contractor can identify these obstacles before they become delays.
Confirming Foundation Stability Before Adding Weight
Adding livable square footage to your attic increases the overall load on your home, and while attics themselves don’t typically stress the foundation the way a new addition would, it’s still worth confirming your home’s foundation is in good condition before taking on a major renovation. Cracks in the foundation walls, uneven floors, or doors that stick can be signs of settling that should be addressed independently of the attic project. Ignoring these signs can lead to bigger structural issues down the road.
If an inspection reveals settling or shifting, arranging foundation repair before construction begins is far more cost-effective than dealing with structural issues after the attic is finished. A stable foundation also gives your contractor confidence that the rest of the renovation will hold up over time. Think of this step as protecting the investment you’re about to make upstairs.
Addressing Existing Attic Windows and Skylights
Many attics already have small windows or vents that were never intended for a living space, and these often show their age with cloudy or condensation-filled glass. This fogging happens when the seal between window panes fails, allowing moisture to collect and permanently cloud the view. It’s a cosmetic and functional issue that’s worth resolving before you finish the surrounding walls and trim.
Since you’re already opening up the space for renovation, it’s an efficient time to replace fogged up window units with clear, properly sealed, energy-efficient models. New windows also improve natural light, which can make a big difference in how spacious the finished attic feels. Choosing units with a good energy rating helps keep the room comfortable without overtaxing your heating and cooling system.
Handling Unexpected Plumbing Needs During Renovation
If your attic conversion includes a bathroom, you’ll need to plan for water supply lines, drainage, and venting, all of which can be more complex in an upper-level space than on a standard floor. Running new plumbing lines through existing framing sometimes uncovers old pipe issues elsewhere in the house that need attention before the new work can proceed. It’s worth having a plumber assess the whole system rather than just the new bathroom addition.
Because older homes sometimes reveal corroded pipes or unexpected leaks once walls are opened up, having access to emergency plumbing services during the renovation timeline can save you from major setbacks. A quick response to a burst pipe or leak keeps drywall and flooring installation on schedule. Discussing this contingency with your contractor ahead of time means you won’t be scrambling to find help if something goes wrong.
Selecting Finishes and Storage for the New Space
Once the structural and mechanical work is complete, the finishing choices are what make the attic feel like a true living space rather than leftover storage. Sloped ceilings and odd angles common in attics call for creative furniture and storage solutions, such as built-in shelving along knee walls or custom closets tucked into low corners. Choosing finishes that complement the rest of your home helps the new room feel intentional rather than an afterthought.
If your attic conversion includes a bathroom, quality bathroom cabinetry designed for compact spaces can maximize storage without overwhelming the room visually. Light colors and mirrors also help smaller attic bathrooms feel larger than they are. Taking time to select finishes that suit the room’s proportions pays off in daily comfort and long-term satisfaction.
Considering Outdoor Additions That Complement the Project
While the attic conversion itself is an interior project, it often inspires homeowners to look at other exterior improvements that make the whole house more functional. If your renovation adds a new dormer with a small balcony or juliet window, shade and weather protection become worth considering. Small additions like this can extend the usability of outdoor-adjacent spaces created by the renovation.
Reaching out to awning companies during this phase can help you explore options for shading new windows or small outdoor nooks created by the conversion. A well-placed awning can also reduce heat gain through new attic windows, easing the load on your cooling system during summer months. It’s a small addition that rounds out the project without adding significant cost.
Turning your attic into genuine living space is a rewarding project, but it depends on getting the fundamentals right before the drywall goes up. From structural assessments to mechanical systems and finishing details, each step builds toward a room that’s safe, comfortable, and worth the investment. Start by having your space professionally evaluated, then work through the planning stages methodically rather than rushing to the fun part. With the right preparation, that dusty attic can become one of the most valuable rooms in your home.